Using Tarsnap GUI on OS X
2016-02-19
![]()
For the past year I've been working on Tarsnap GUI, an open source cross-platform frontend for the Tarsnap backup service. Tarsnap is an online, fully encrypted, deduplicated, online backup solution, that's been around for close to 10 years now (unlike other online backup offerings with a lifespan smaller than 5 years). Starting with day one, full source code for the client tools was available for review and to establish trust. A bug bounty program is available and any kind of reporting is taken seriously, promptly responded and adequately rewarded by the creator and principal developer of Tarsnap, Colin Percival. Tarsnap uses a prepaid model, you add credit to your account and you'll only pay for what you use and nothing more, no annual or monthly subscriptions. For the moment, the price per MB (SI notation) of storage (used monthly) and MB transferred is 250 picodollars each. The backend infrastructure is powered by AWS.
Tarsnap was originally offered as a command-line suite of tools, in true allegiance to the Unix philosophy, very similar to the tar utility, for maximum flexibility and control over your backup routines and of great relevance for the server world. Die-hard Unix users and admins see no distinction between server administration and personal workstation and thus nothing is stopping you from backing up your personal machines and workstations the same way you would a networked server. Tarsnap GUI comes to the rescue here in filling whatever gap might be between the server and desktop workflows and for the people that like to keep real work inside the Terminal and all else contained in easy to use, slim, yet robust GUIs. What follows is a small tutorial on how to get started with Tarsnap GUI to back up your OS X desktop. Setting the platform differences in the Installation and Scheduling sections aside, this tutorial is very relevant to the other supported platforms too.
Register with Tarsnap
First and foremost you need to register on the Tarsnap website and add some credit via the preferred method of payment (Credit card, Paypal and Bitcoin are accepted methods). Five bucks would suffice for a start. Read a bit on the homepage and getting started page just to get acquainted with Tarsnap. Tarsnap doesn't ask, thus doesn't need to store any personal information besides your e-mail address.
Installation
At the moment of writing this tutorial, Tarsnap GUI version 0.8 and Tarsnap CLI version 1.0.36.1 are the latest offerings and installing from source is the preferred method of installation for all platforms, although we are working towards changing that at some point.
Installing from source on OS X is pretty easy thanks to Homebrew, an alternative to Mac ports. Once you installed Homebrew or updated to the latest version (tarsnap-gui was recently added to the homebrew-gui repo), installing Tarsnap is as simple as executing the following command in Terminal:
brew tap homebrew/gui && brew install tarsnap-gui && brew linkapps tarsnap-gui
What this will do is fetch the latest stable versions of the Tarsnap command-line utilities and the GUI front-end along with their dependencies from Github, compile from source and then add useful symlinks to the appropriate system directories. The Tarsnap command-line utilities are symlinked in /usr/local/bin and a symlink for Tarsnap.app should be in /Applications.
If Homebrew is not a desirable option for you or you're reading this with *Linux or *BSD in mind, the steps for installing manually from source are best described in the INSTALL dist file. Some BSD flavors like FreeBSD, PCBSD have already incorporated tarsnap-gui into their repos or ports trees, or plan to like OpenBSD in next version, so it might be worth to look for it there before deciding to proceed with the manual steps. Upstream Linux RPM and DEB packages are being considered for a change.
Wizard setup
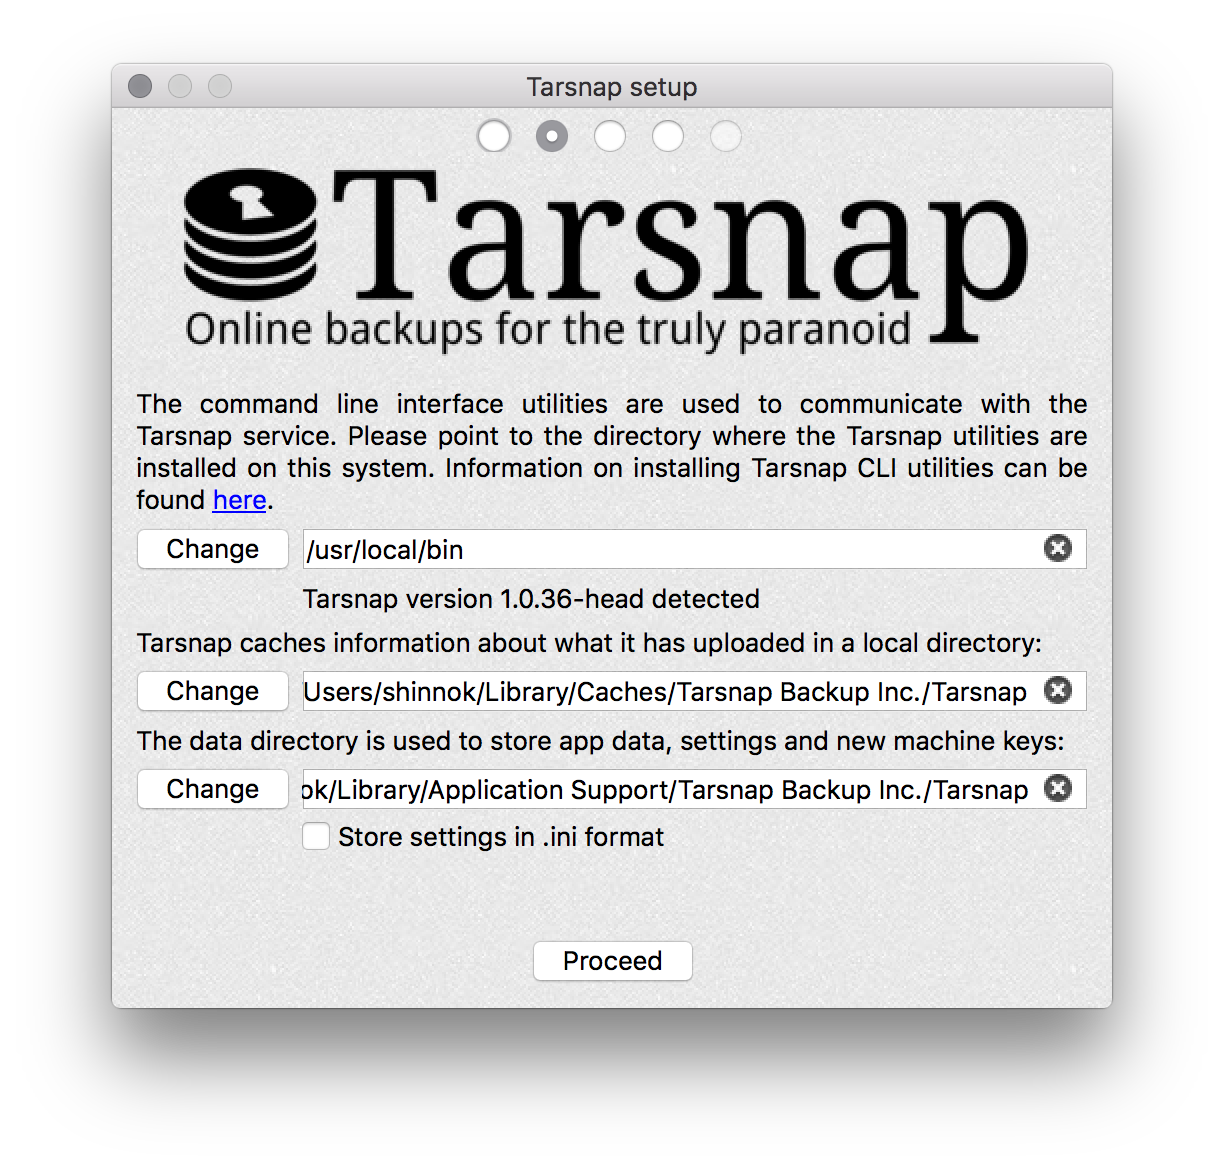
Upon opening /Applications/Tarsnap.app you will be greeted with the following:

This is the setup wizard and will help you get started with using Tarsnap in no time. The first step for the wizard is to find the Tarsnap command-line utilities that are used to talk with the Tarsnap servers. In the Homebrew case, they will be located in /usr/local/bin and depending on the PATH environment variable for your current user the wizard will either direct you to the Advanced page to set that directory manually or proceed right next to the next step for the case where you already have it in your PATH. You don't have to worry about the other settings in the Advanced page for now.
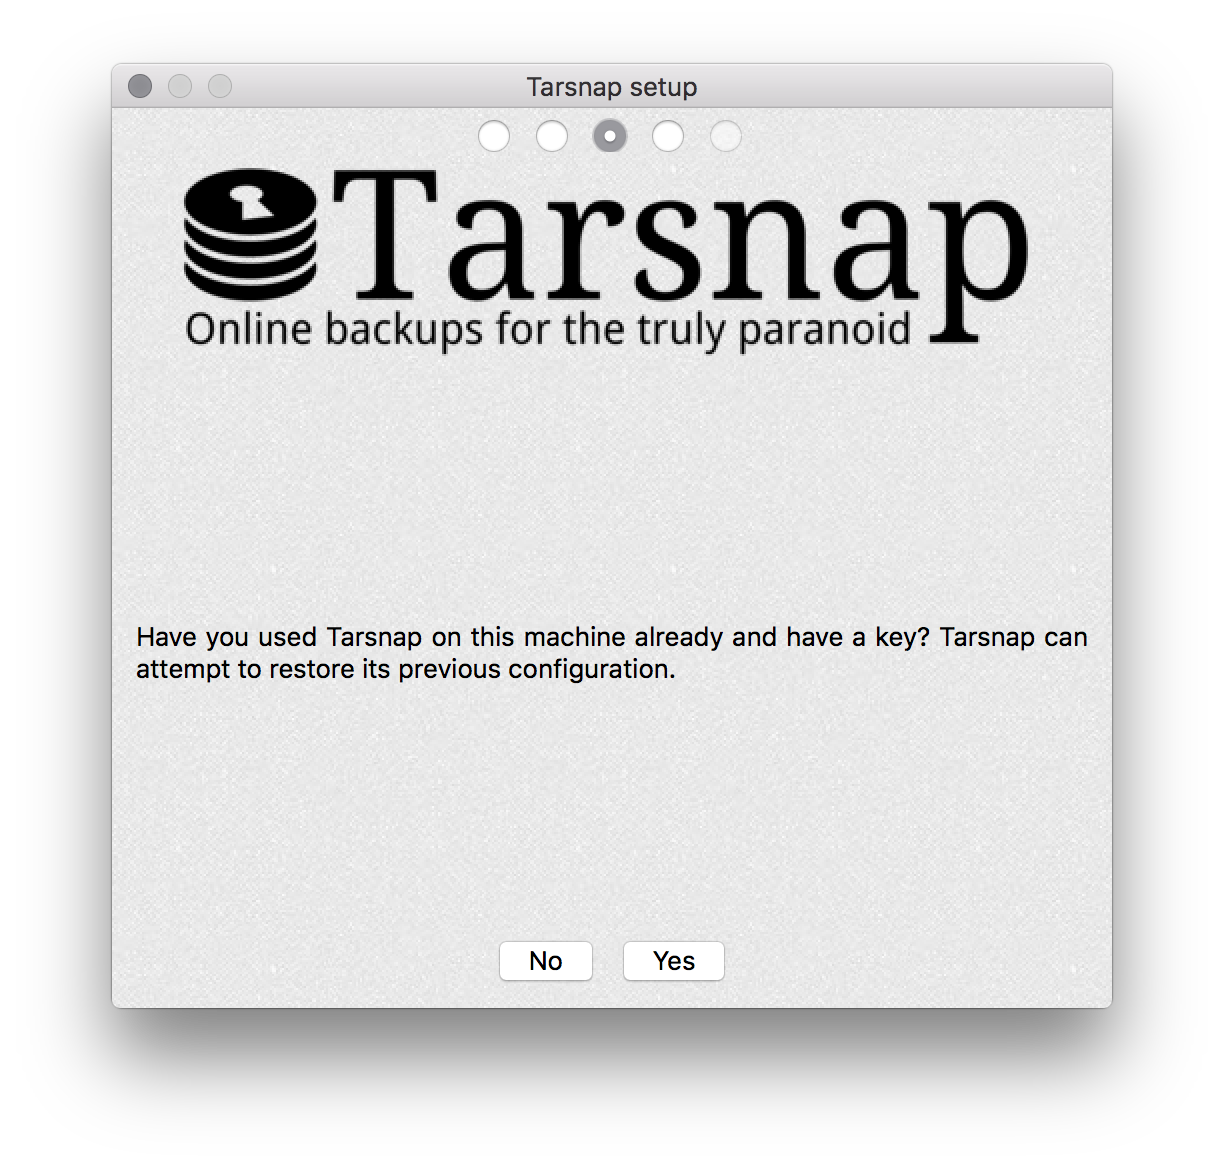
On the next screen you will be asked if you used Tarsnap on this machine already, assuming this is a fresh setup you should click on No. If you already used Tarsnap in the past and have a key for that machine (it is good practice to use a different key for every machine), I'm guessing you already know what you're doing and thus you can proceed the other way around. Upon clicking on No you end up to this screen:

This is where you fill in your Tarsnap account credentials from the Registration step. When you click on Register machine, your encryption key is created locally and an accounting record using the Machine name specified is created on the Tarsnap server and associated with a signature of the key. This is used for generating your service and credit usage reports per machine (or key signature, the machine name doesn't matter much and can be anything you want), for your convenience, on Tarsnap.com. The actual key used for encrypting your data never leaves your machine. Your backups are safe as long as you will be able to hold on to this key privately. If you lose this key your backup data is gone forever. The actual path where the key is stored on your system, along with some useful advice, will be revealed to you in the last screen upon successful registration.
That's all it takes to quickly set up Tarsnap on your desktop, rather simple right? Let's proceed by taking a first look at the main app window.
First impressions
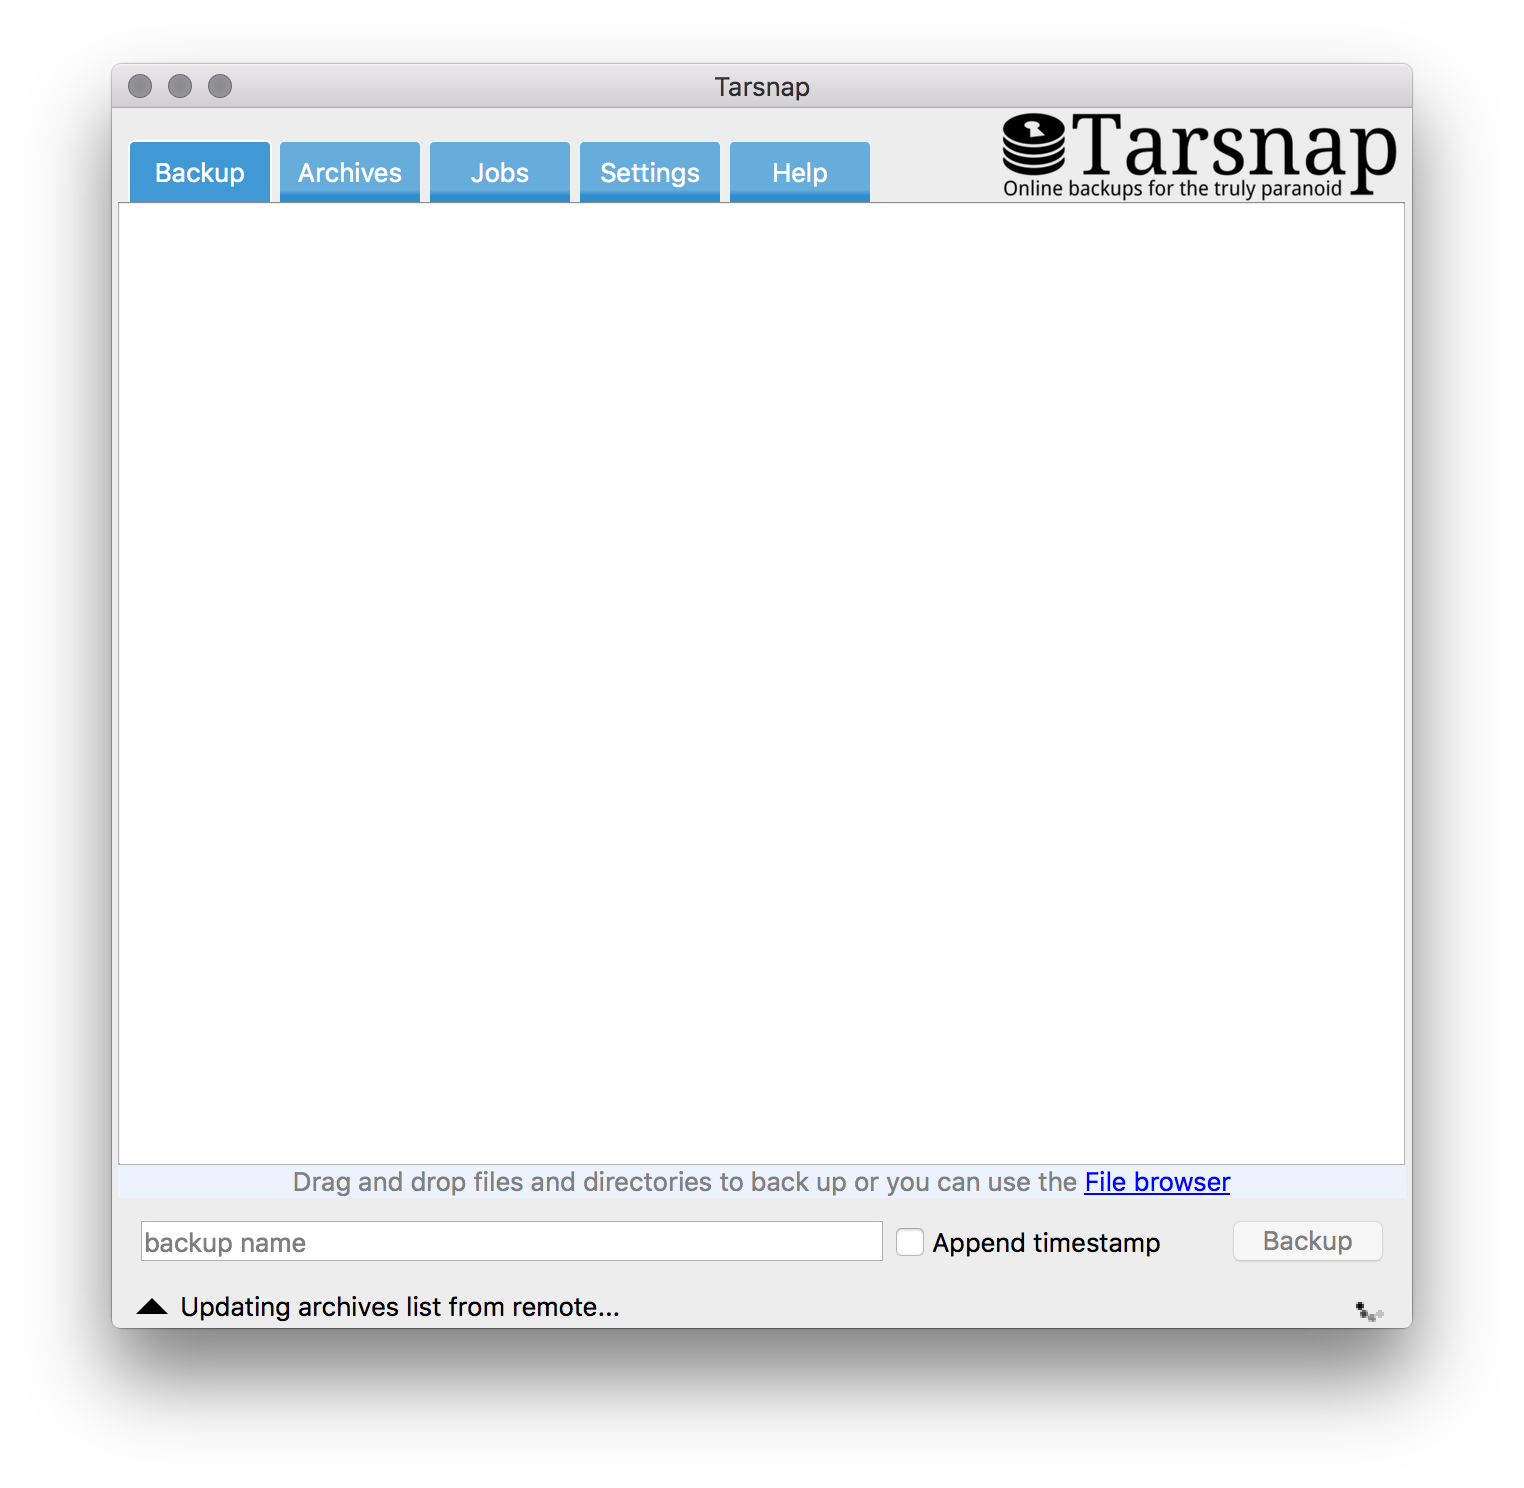
The first thing you'll see is the empty Backup pane. The Backup tab is used to quickly put to rest arbitrary files and directories of your choosing to Tarsnap. Think of it like a convenient one-time drop bin, where you can easily drag and drop important files, set a name for the archive, hit Backup button and forget about it.
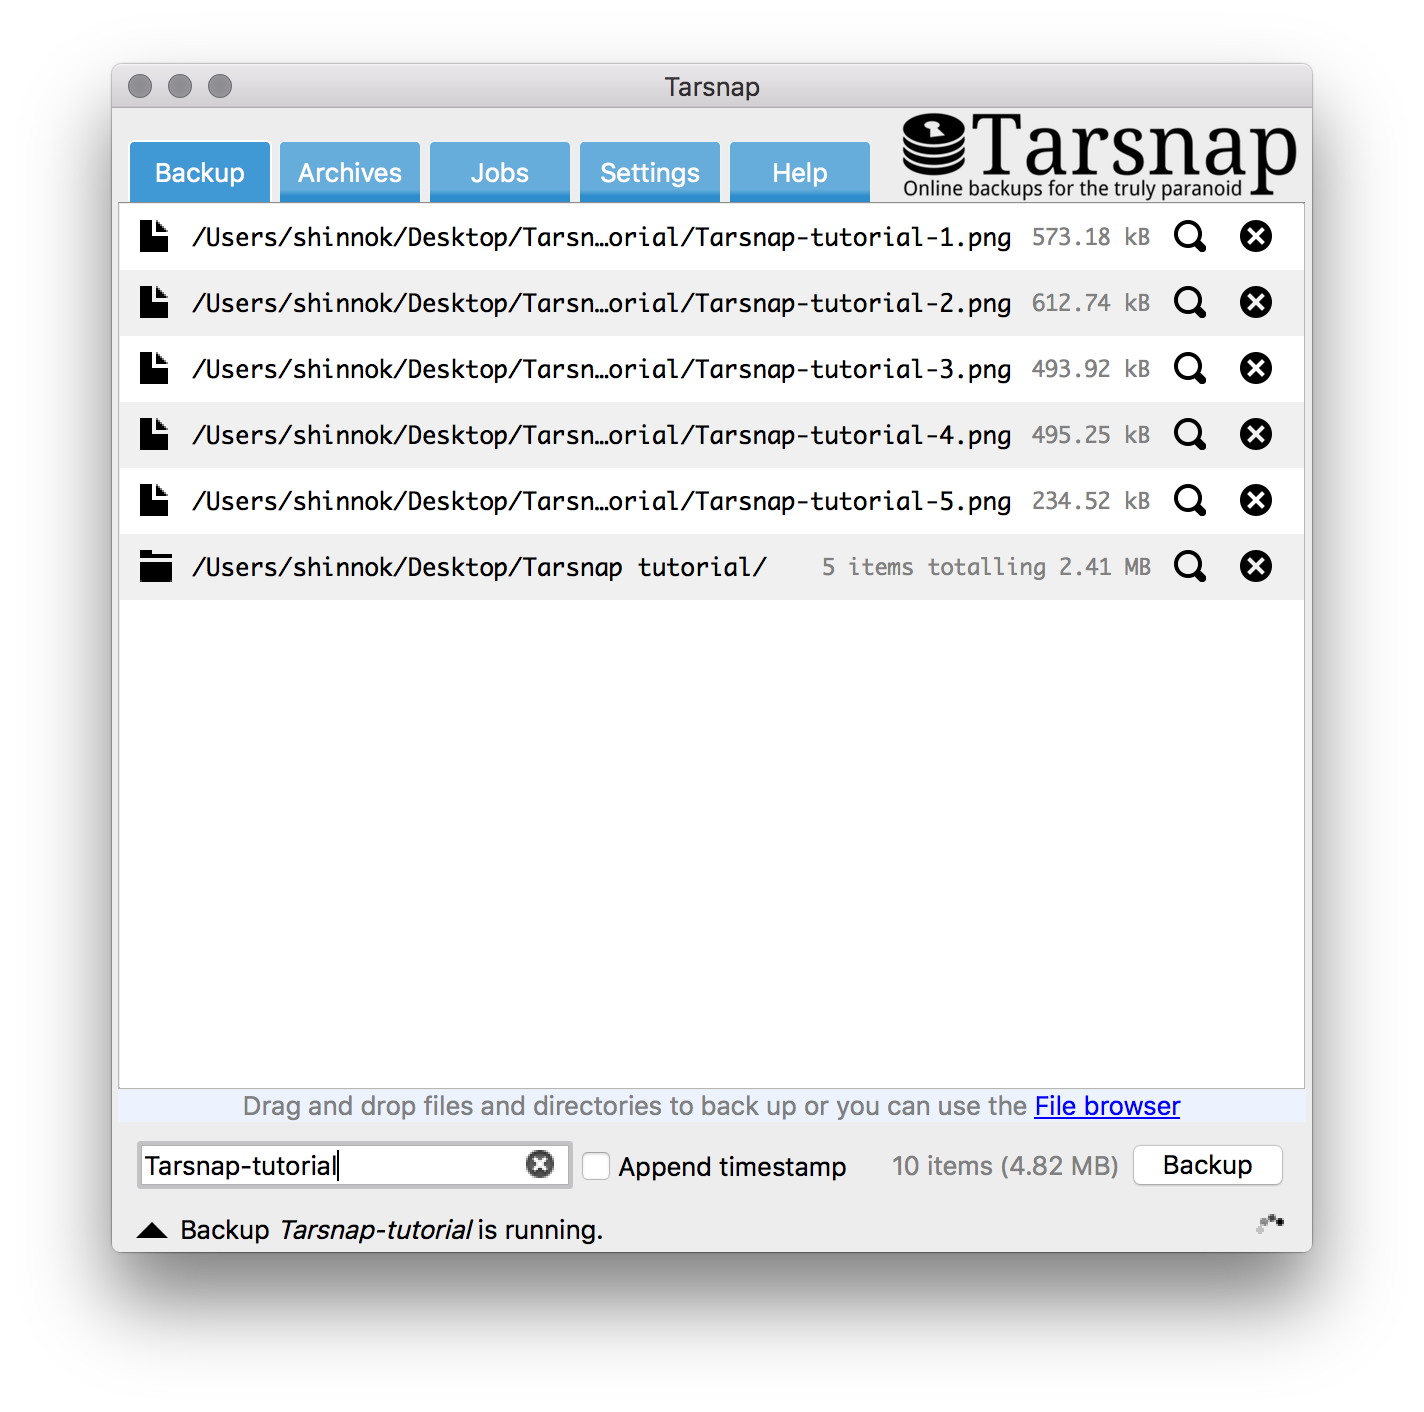
Clicking the Backup button will result in an archive named Tarsnap-tutorial consisting of the files and directories added to the list. In a matter of seconds I have an off-site, encrypted backup of the resources in this tutorial, awesome right? Now let's look for the archive just created, leading the way to the next pane, Archives:
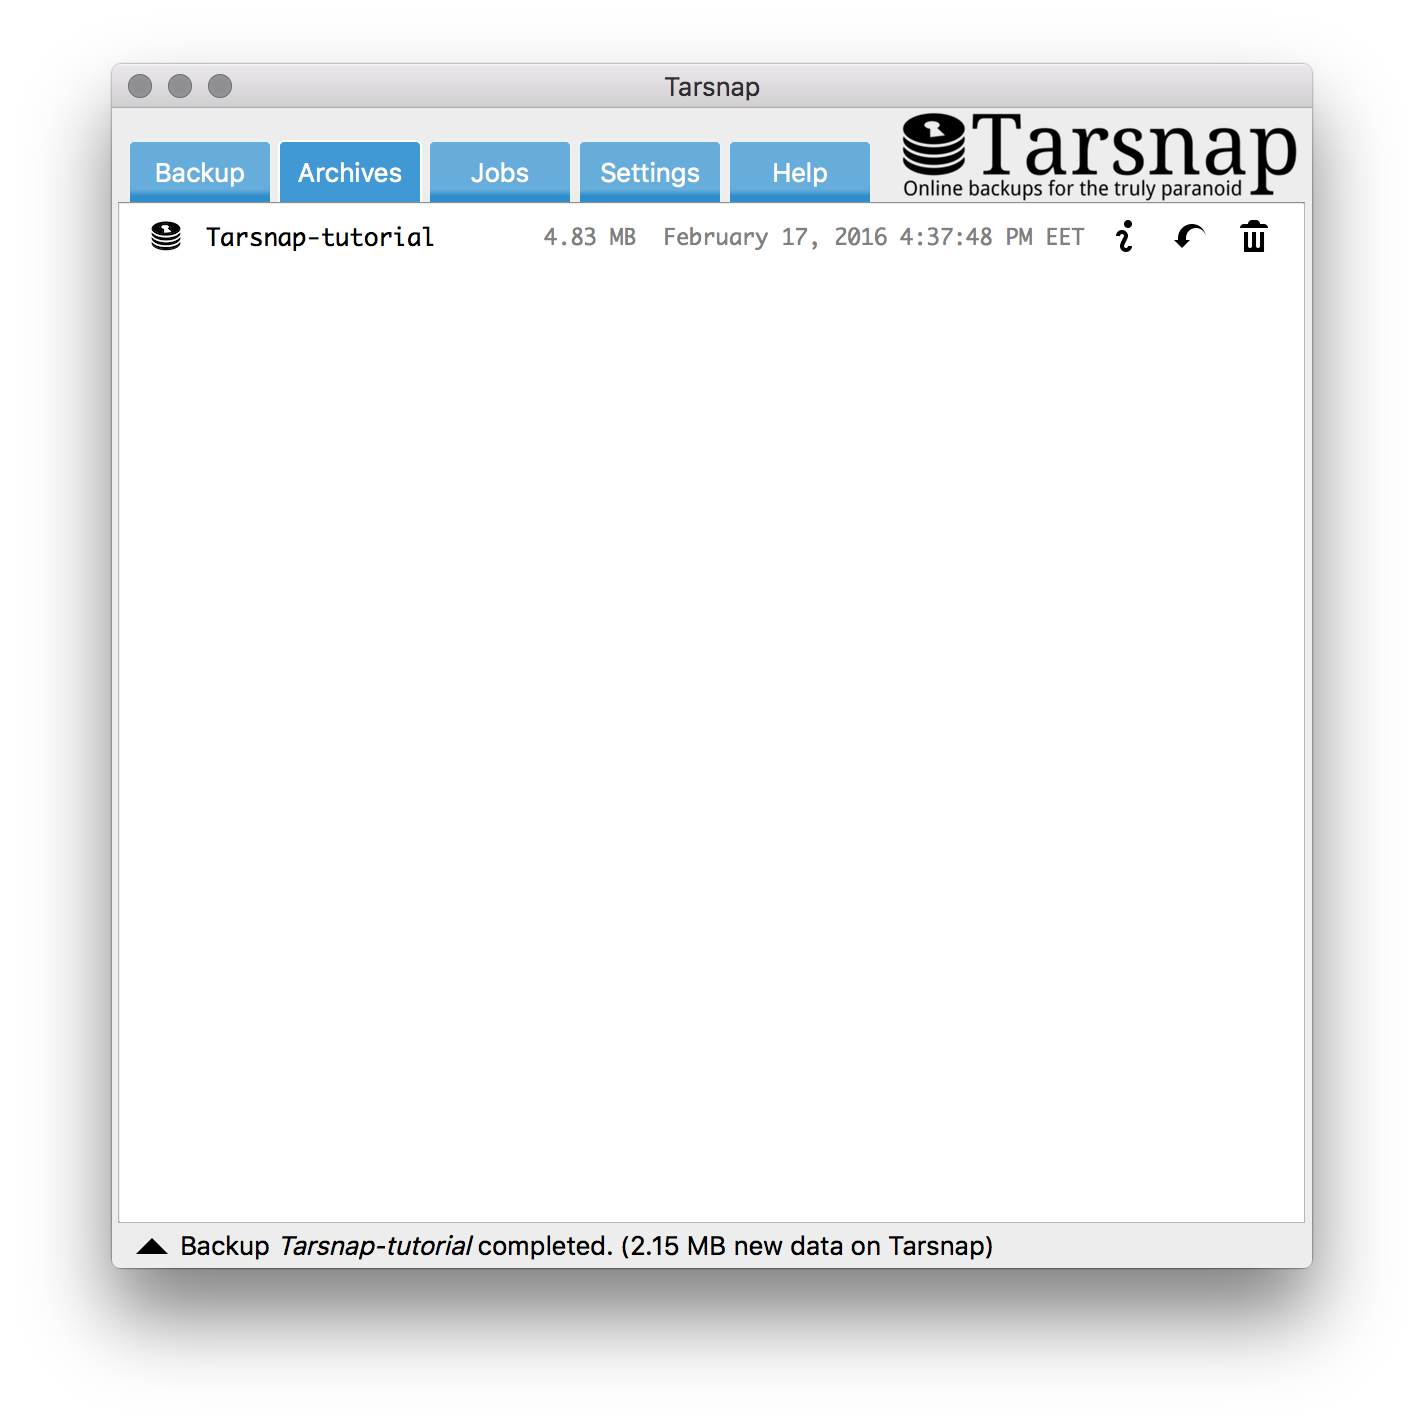
This pane lists all the archives created for the current machine/key, providing for means to manage, inspect and restore archives. You can already notice the Tarsnap-tutorial archive. Let's double click that item to get a detailed look:
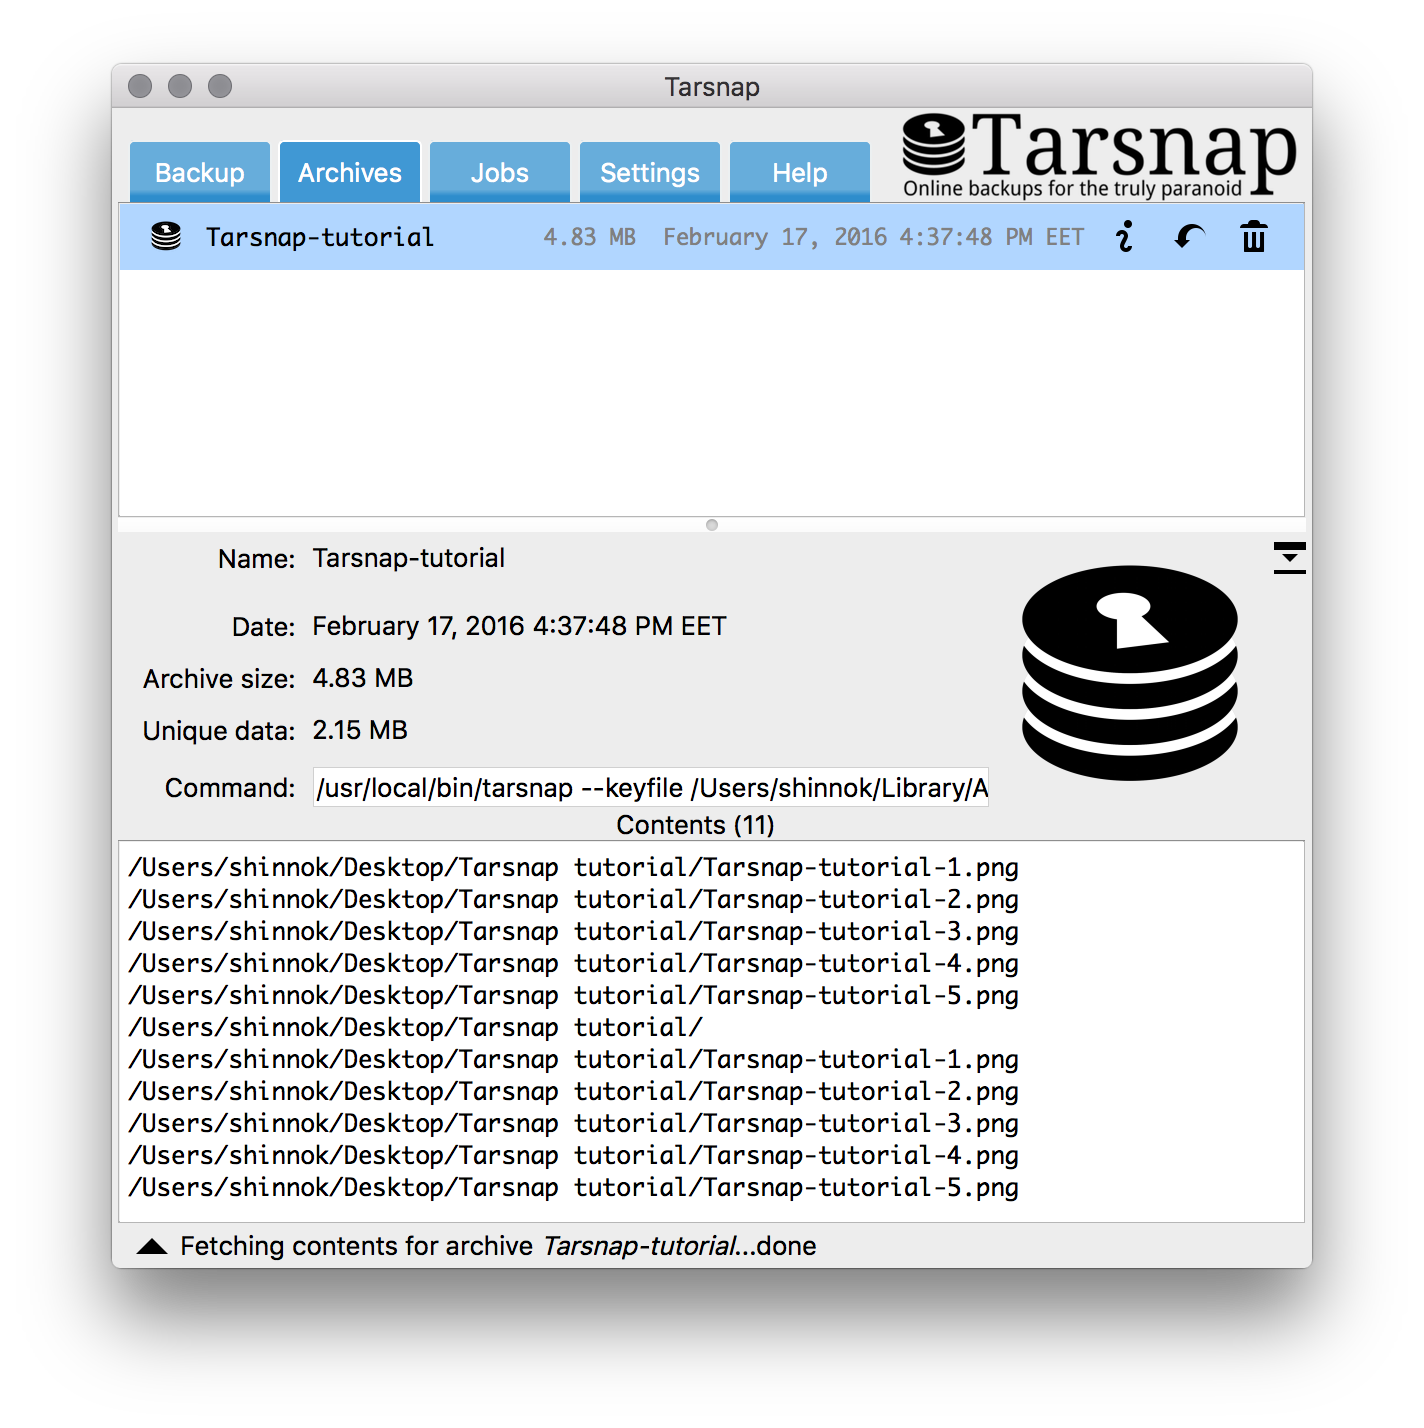
You can notice several things from this view that describe an archive in Tarsnap terms:
- The archive name, Tarsnap-tutorial in this case. The name can be any arbitrary combination of characters, excluding the null character and must be unique amongst all the existing archives.
- The archive size, 4.83MB in this case. This is the original size of all the items included in a backup, before deduplication and compression.
- Unique data, 2.15MB in this case, what you pay for. This is the archive size post deduplication and compression. As you can see, Tarsnap is smart enough not to waste your credit on duplicate data, even for single archives.
- A command. This is the exact command-line used by the application to create the archive. Every single action executed by the GUI app has a direct command-line equivalent, which can be reviewed in the Help -> Console pane. Total transparency, control and debugging capability. You can even use this to learn how to operate Tarsnap at the command-line.
- Contents listing. This list contains all the source files and directories included in an archive.
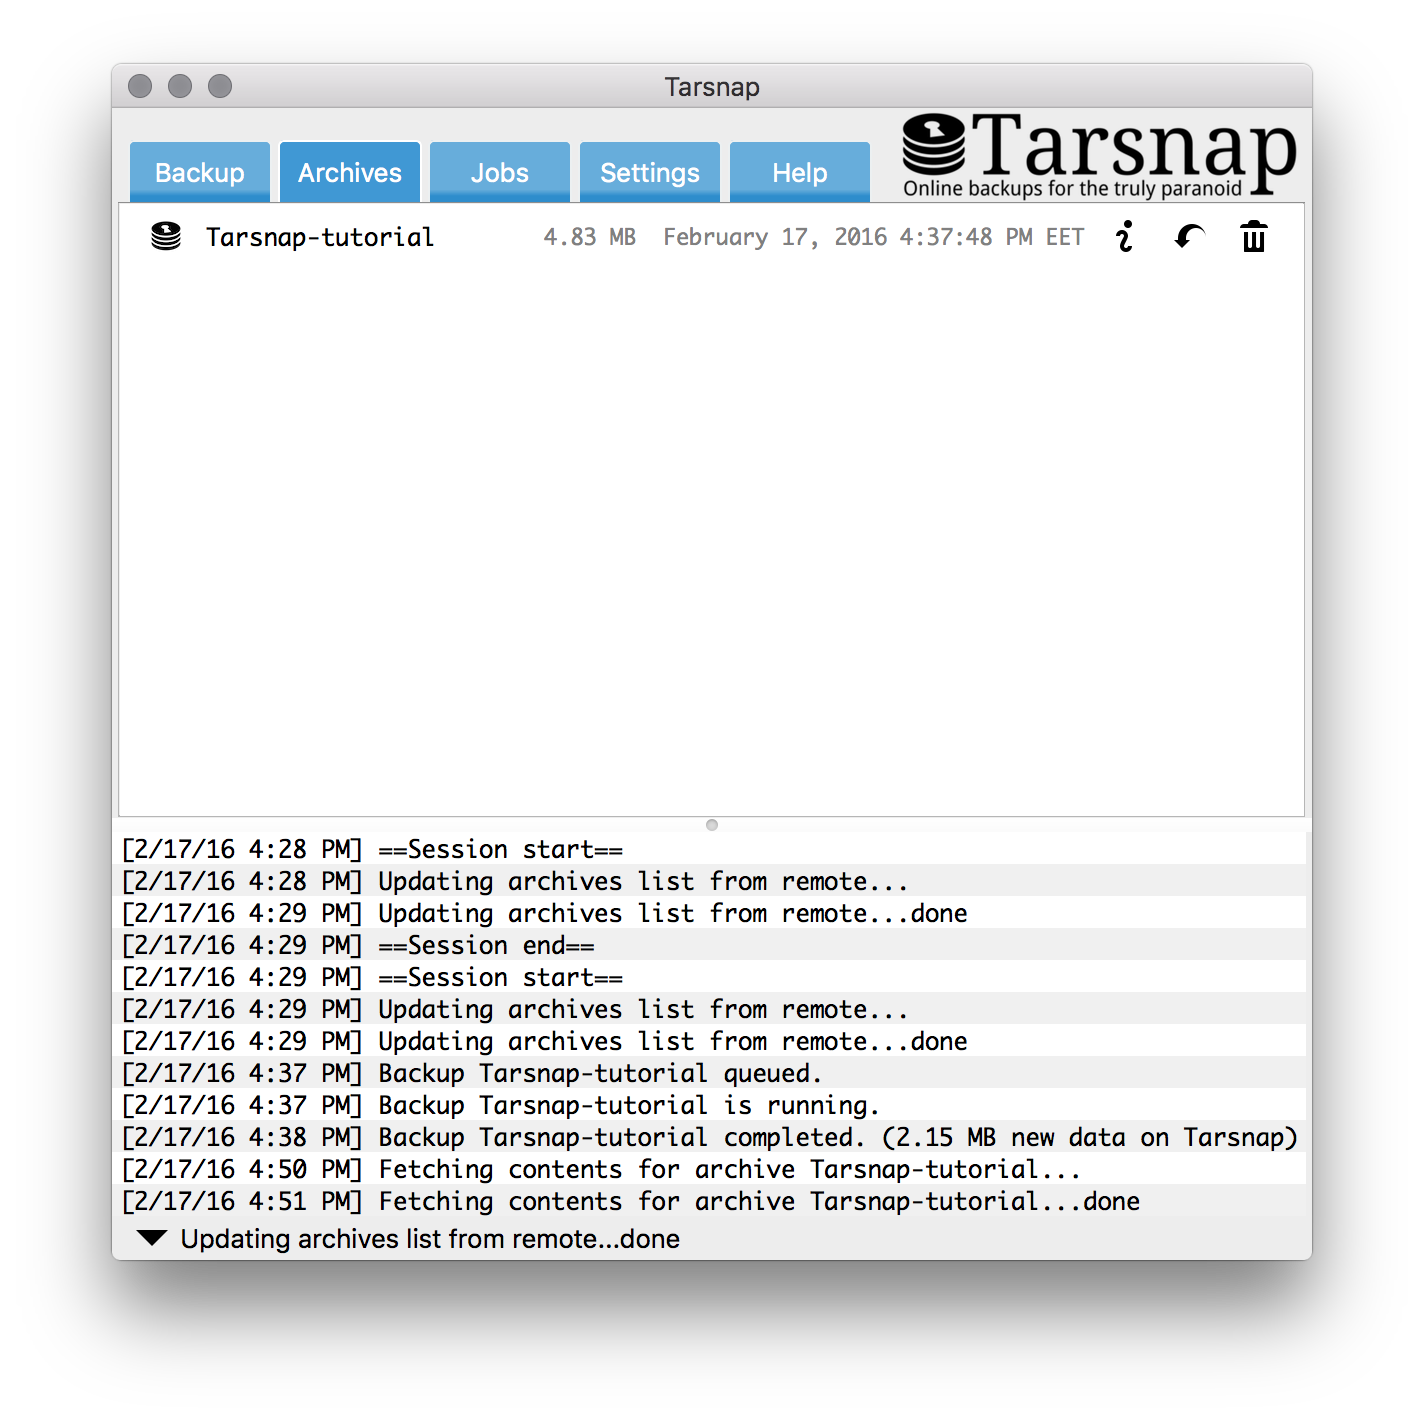
Every Tarsnap operation is accompanied by a status bar message. When Tarsnap is working with the server a loading circular orb will animate to indicate activity. All of the status messages are logged and can be reviewed by expanding the Journal with a click on the arrow head in the status bar.
Using Jobs
The obvious evolution from simple on-demand one-shot backups are Jobs, logical definitions for important locations in your file system that you know are going to be backed up regularly. These could be your Documents, Work or Desktop directories. Let's define one now for the Tarsnap tutorial directory used previously, by switching to the Jobs tab, clicking on Add Job button and filling up the Job specifics:
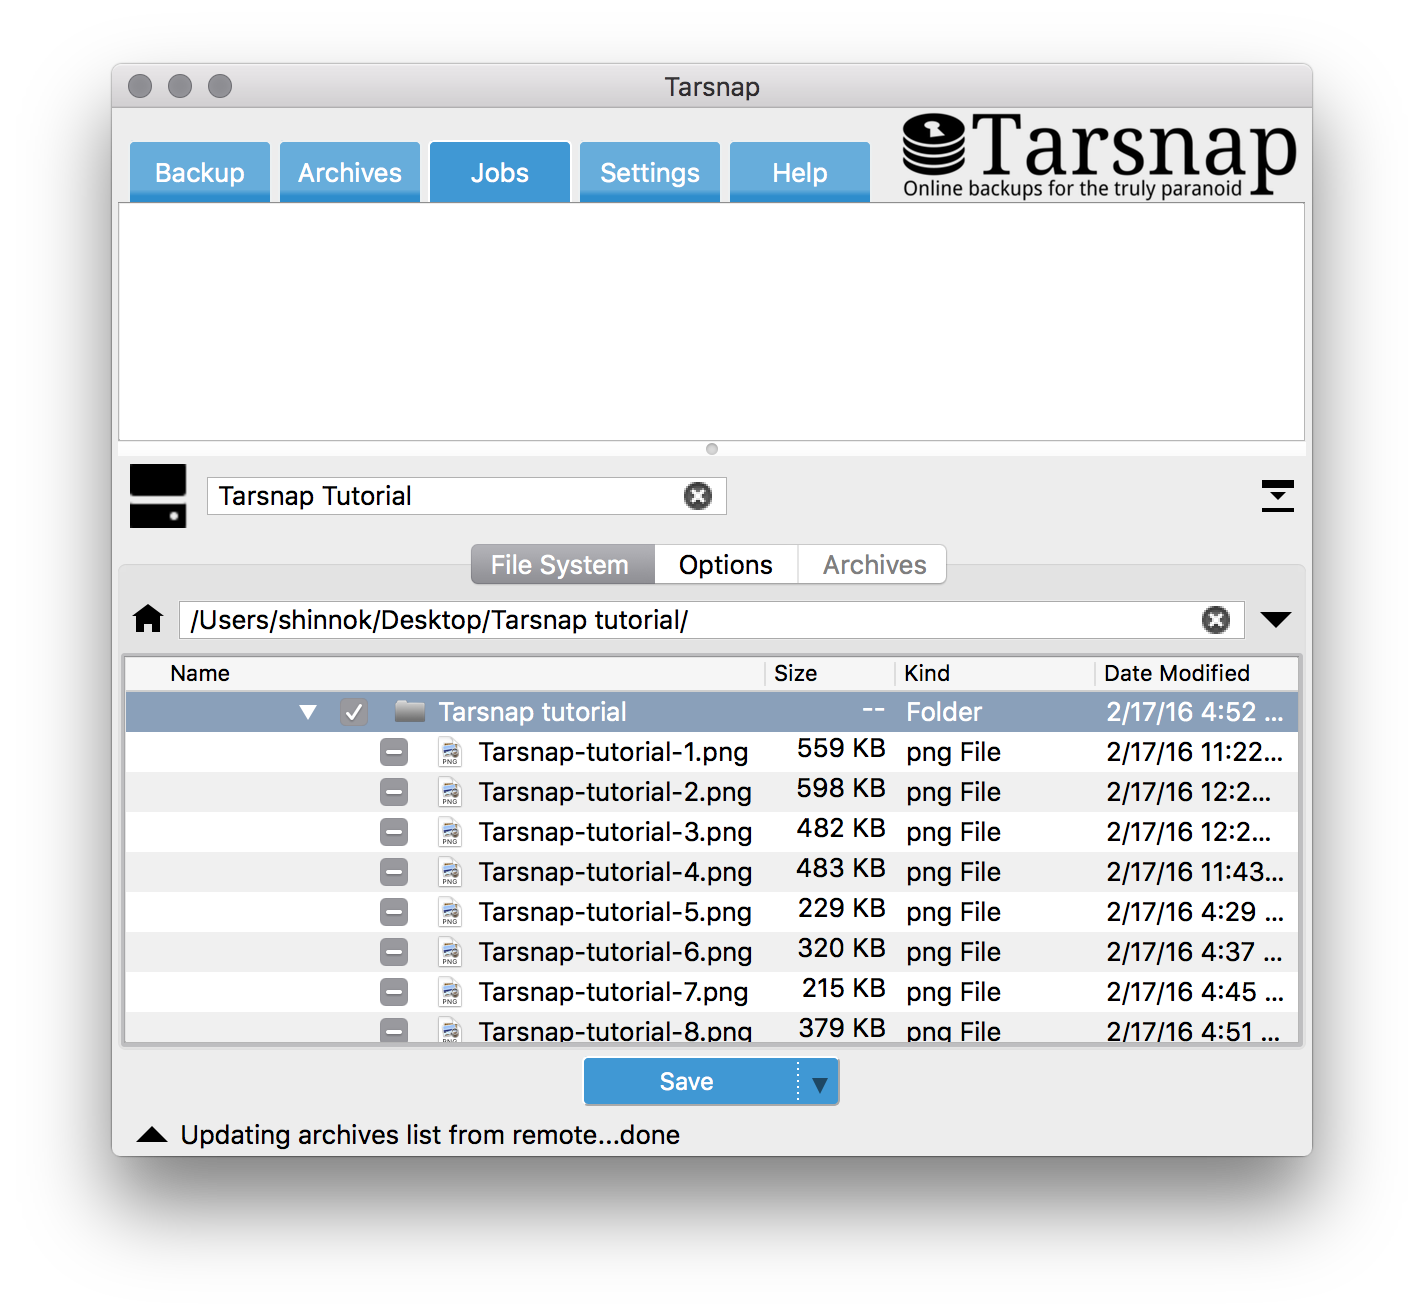
So a Job is:
- A name, Tarsnap Tutorial, in this case. This name is prepended to the archive names for this Job.
- Files and directories selected in the File System tab. This is what you want to back up as part of this Job.
- Options particular to this Job. We'll take a look at this later on.
- Archives pertaining to this Job. None yet thus pane is disabled.
Let's change fact no. 4 and create the first backup for this Tarsnap Tutorial by Saving the Job and then clicking the Backup button for the Job entry that appeared in the list:
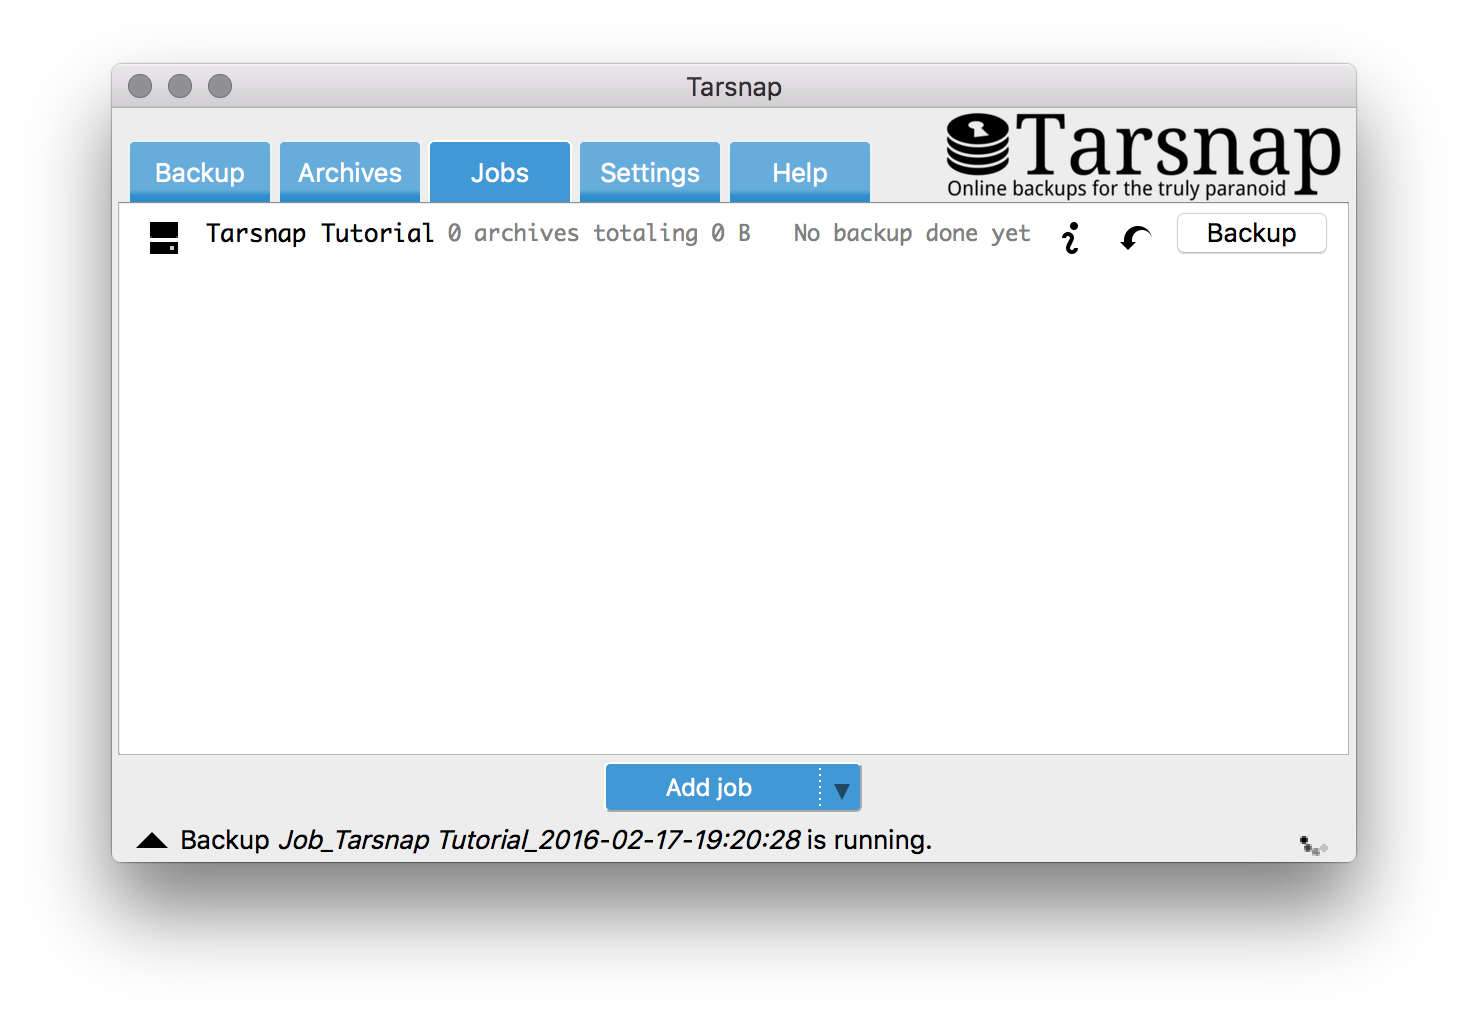
A couple seconds later:
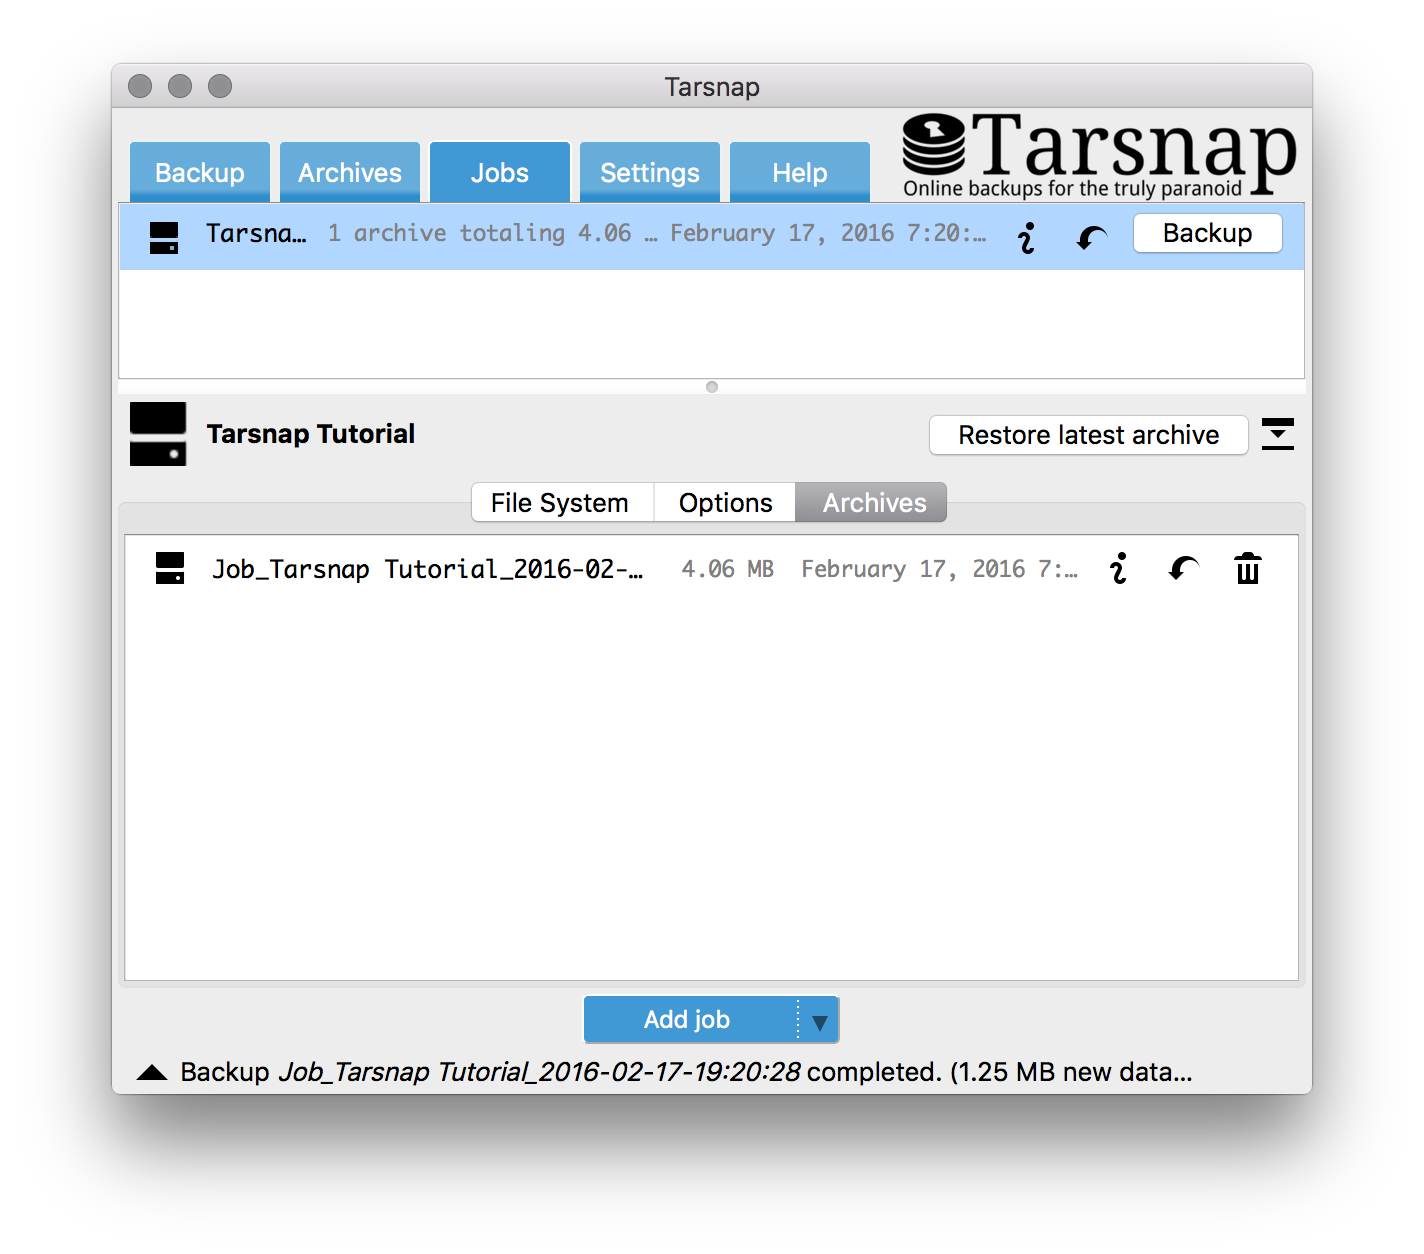
Double click the resulting archive in the updated Job -> Archives pane and let's take a look at the result:
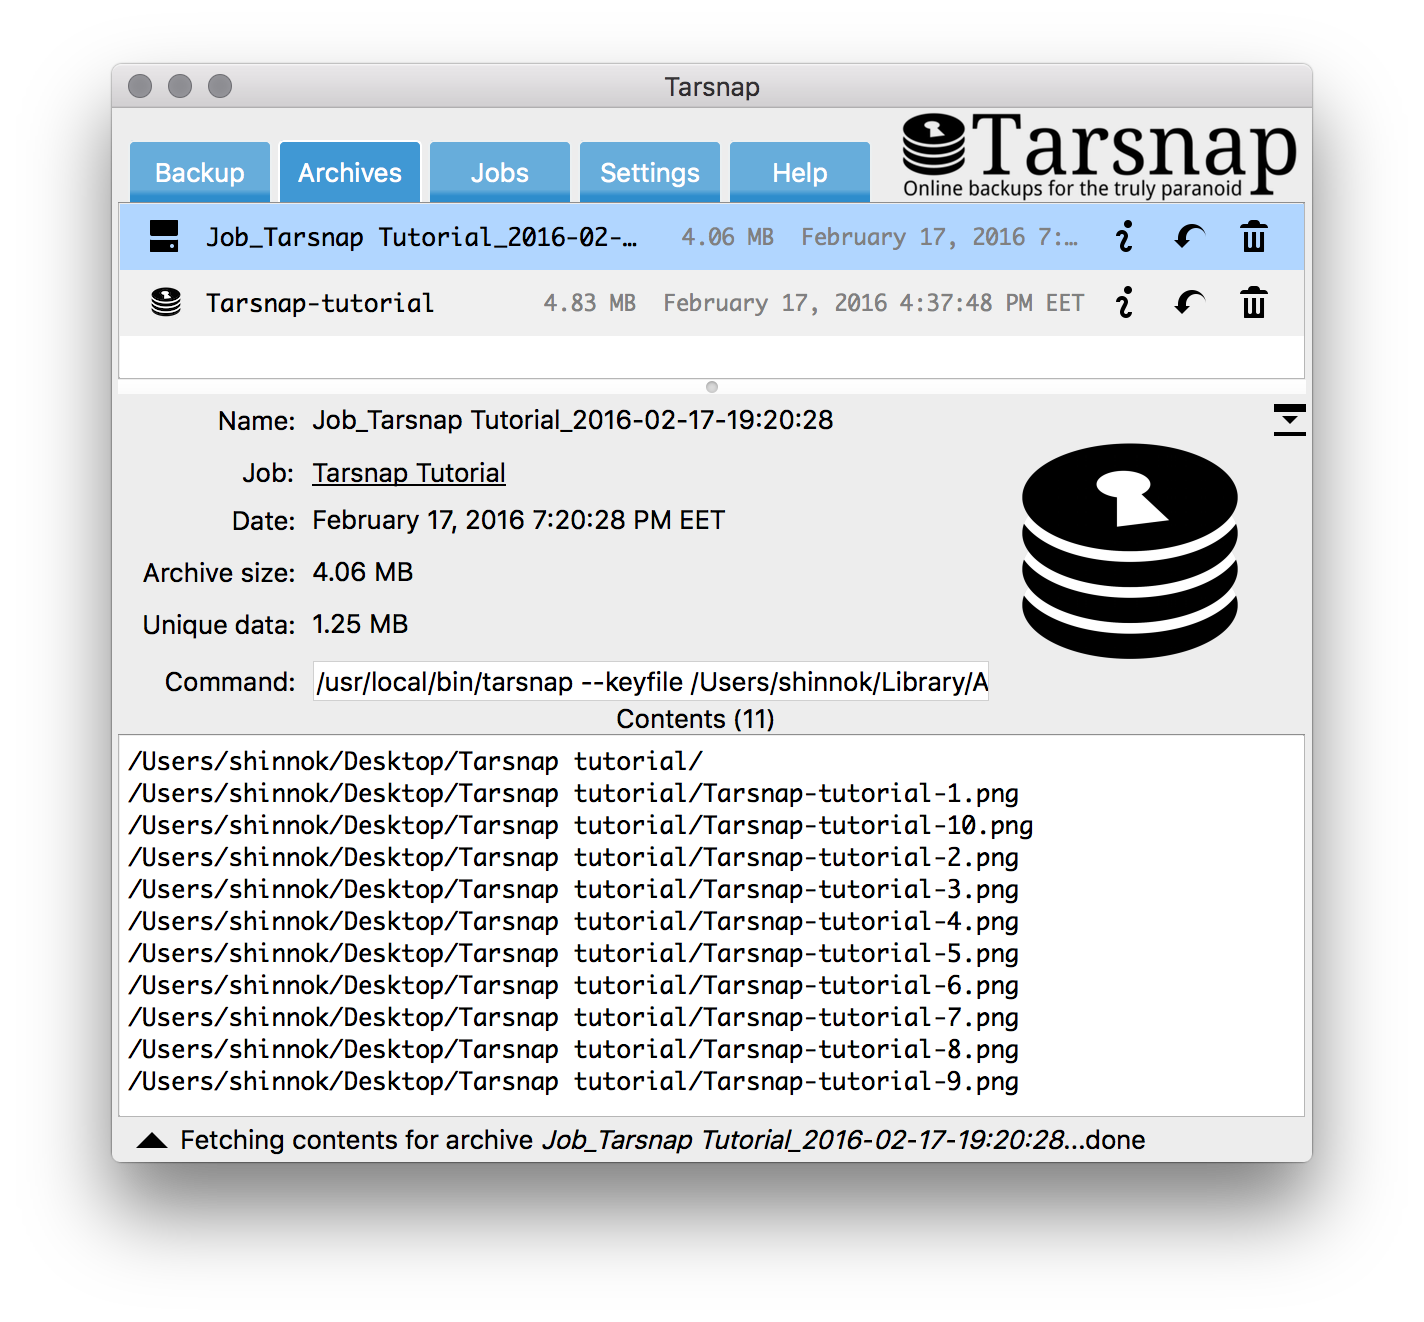
A Job archive has all the properties as the previously created on-demand archive. A couple observations are worth noting:
- The Job_ prefix is prepended to the archive name;
- The archive has a reference to the Tarsnap Tutorial Job. You can jump to the Tarsnap Tutorial job by clicking on the Job icon in the archive listing or the Job: label;
- I've added 5 extra screenshots to the directory since the previous on-demand archive. If you take a look at the Unique data label you'll notice that only 1.25MB of data has actually been uploaded to the Tarsnap server and thus you'll only be charged for that. This is the deduplication magic in action that works between all archives created with the same key and will save you a lot in the long term when backing up from the same sources of data in what amounts to, basically, incremental backups.
- Tarsnap also compresses your data after deduplication step for maximum storage, bandwidth and resulting cost efficiency. In this case I'm backing up PNG files which are already compressed data formats (also MPG, AVI, MP3, MP4; in general any modern media format has some level of compression), but if I were to backup source code, text files, documents and other raw formats the amount of savings will be even greater. This also means that it's pointless and even detrimental to the efficiency of Tarsnap if you're compressing your files manually before using Tarsnap.
This is the basics of using Jobs with Tarsnap GUI. What you should do next is define individual Jobs for each of your important file system locations like Documents, Pictures, Desktop and your Work directory. You can back up all your Jobs at once by clicking on the Add job button drop down and Backup all jobs or selecting all Jobs and hitting CMD+b keyboard combo. For a full listing of keyboard shortcuts available see Help pane.
Next we're going to take a look at scheduling automated backups for Jobs.
Scheduling
At the moment, scheduling automated backups for your Jobs requires a bit of knowledge about your Operating System scheduler and some degree of manual work. Given that Tarsnap GUI is cross-platform (OS X, BSDs, Linuxes and Windows in the future) and that every platform usually differs in the best choice for scheduling, it's quite tricky to code a solution that applies elegantly and reliably for all, so for the meantime we're left with a manual approach. I'm working towards changing that in a future release, if you want to find out when that happens it's best you either follow the project on Github or subscribe to the tarsnap-users mail list (links at the bottom of this post).
The best scheduling method on OS X is Launchd. Tarsnap GUI executable has a command line parameter called --jobs:
/Applications/Tarsnap.app/Contents/MacOS/Tarsnap -h Usage: Tarsnap [options] Tarsnap GUI - Online backups for the truly lazy
Options: ... -j, --jobs Executes all jobs sequentially that have the 'Include in scheduled backups' option checked. The application runs headless and useful information is printed to standard out and error.
You can probably figure out what's coming next. We're going to schedule Tarsnap --jobs with Launchd to run on a schedule. Before we do that we need to enable Tarsnap Tutorial job for inclusion into automatic backups (-j). There's an option for that, named Include in scheduled backups:
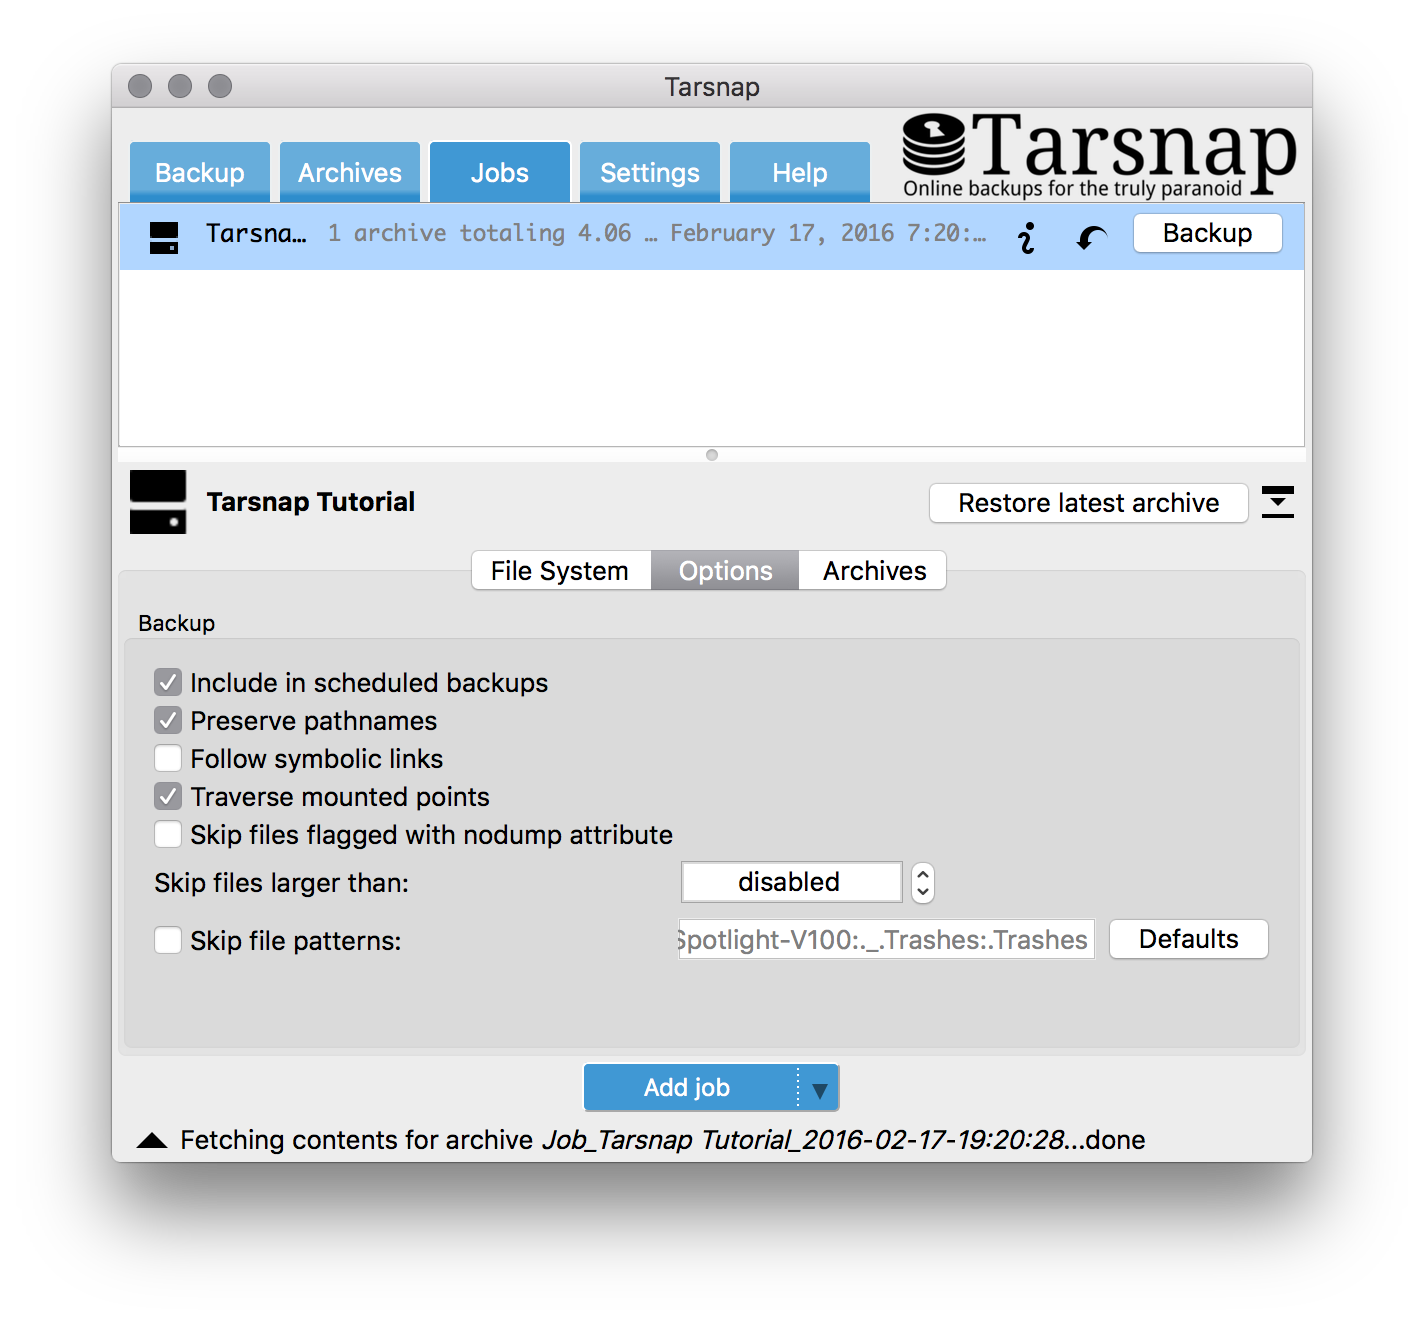
The option is disabled by default and you need to check it as shown in the screenshot.
For the last step you need to open Terminal and download a sample Plist file that describers the invocation routine for Launchd to the appropriate location and enabe it using launchctl command. You can take a look at the sample plist from the repo on Github:
curl https://raw.githubusercontent.com/Tarsnap/tarsnap-gui/master/util/com.tarsnap.backup.plist > ~/Library/LaunchAgents/com.tarsnap.backup.plist launchctl load ~/Library/LaunchAgents/com.tarsnap.backup.plist
This launchd script will invoke Tarsnap -j every Sunday at 10AM or the next wake from sleep or system boot right after that (for cron fans, beware that crond doesn't do that on OS X). So the next time when that date comes around all Jobs that have the Include in scheduled backups option enabled will be backed up. Let's do a test run now and see what happens:
/Applications/Tarsnap.app/Contents/MacOS/Tarsnap -j
Assuming you have notifications enabled on OS X (otherwise you're stuck with the output in Terminal) this is what you'll see:
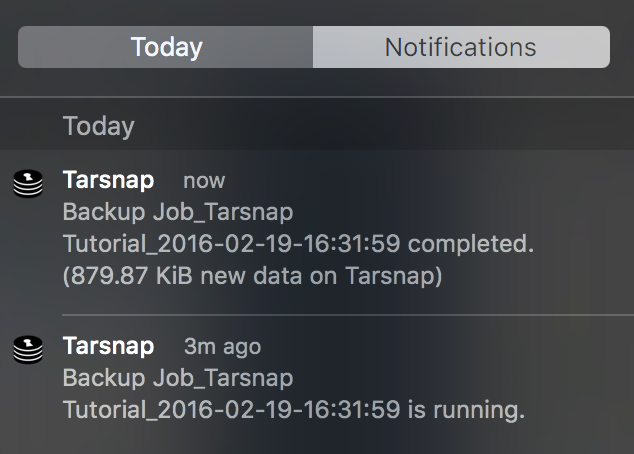
When executing Jobs in the background, Tarsnap GUI will have an icon in the menu bar and desktop notifications will notify you of what's happening. If you click the tray icon or the notifications the app will fire up.
Now if you're reading this with Linux or BSD in mind, all you have to do to schedule your backups is replace Launchd with something like crond.
Restore
What use are backups though without a simple method for restoring backed up data in case of need? Tarsnap GUI takes care of that without much fuss. Let's delete the Tarsnap tutorial directory and attempt a restore from the latest Tarsnap Tutorial backup by clicking on Restore latest archive button for the Job.
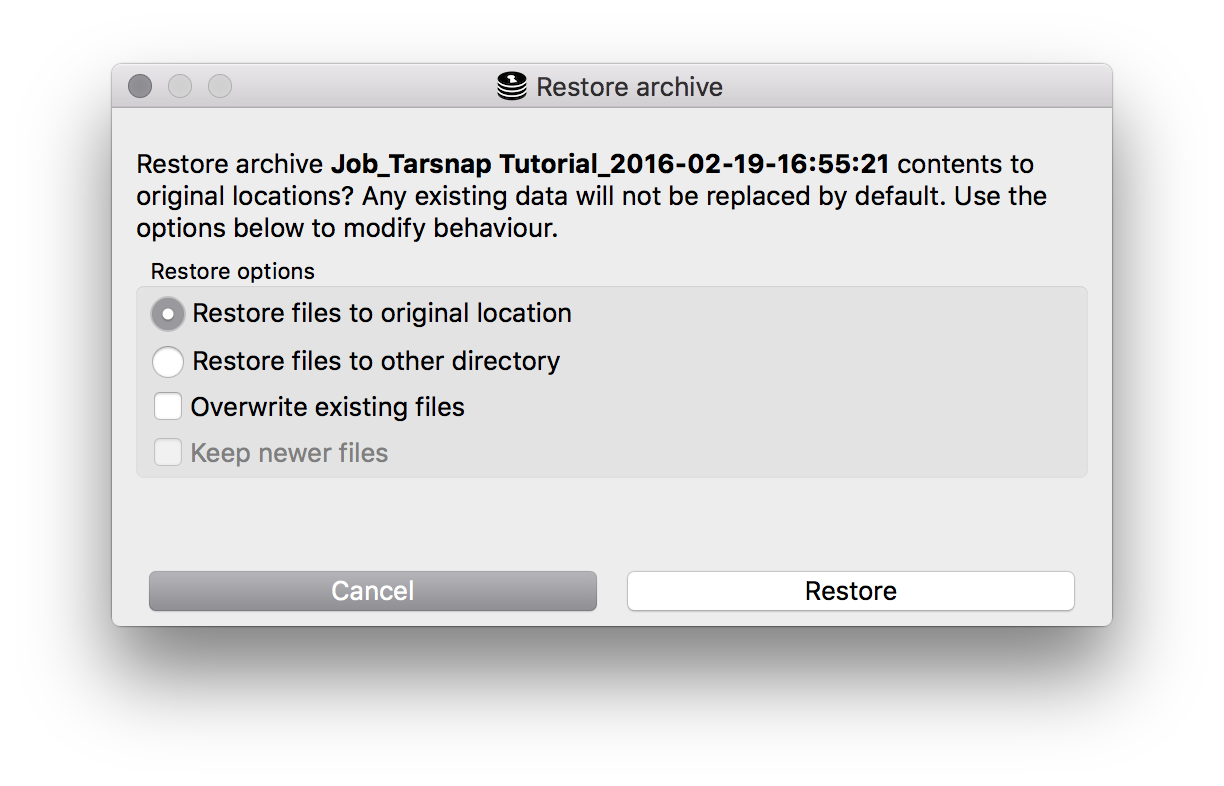
Clicking Restore immediately commences the restoration of files in the last Tarsnap Tutorial backup.
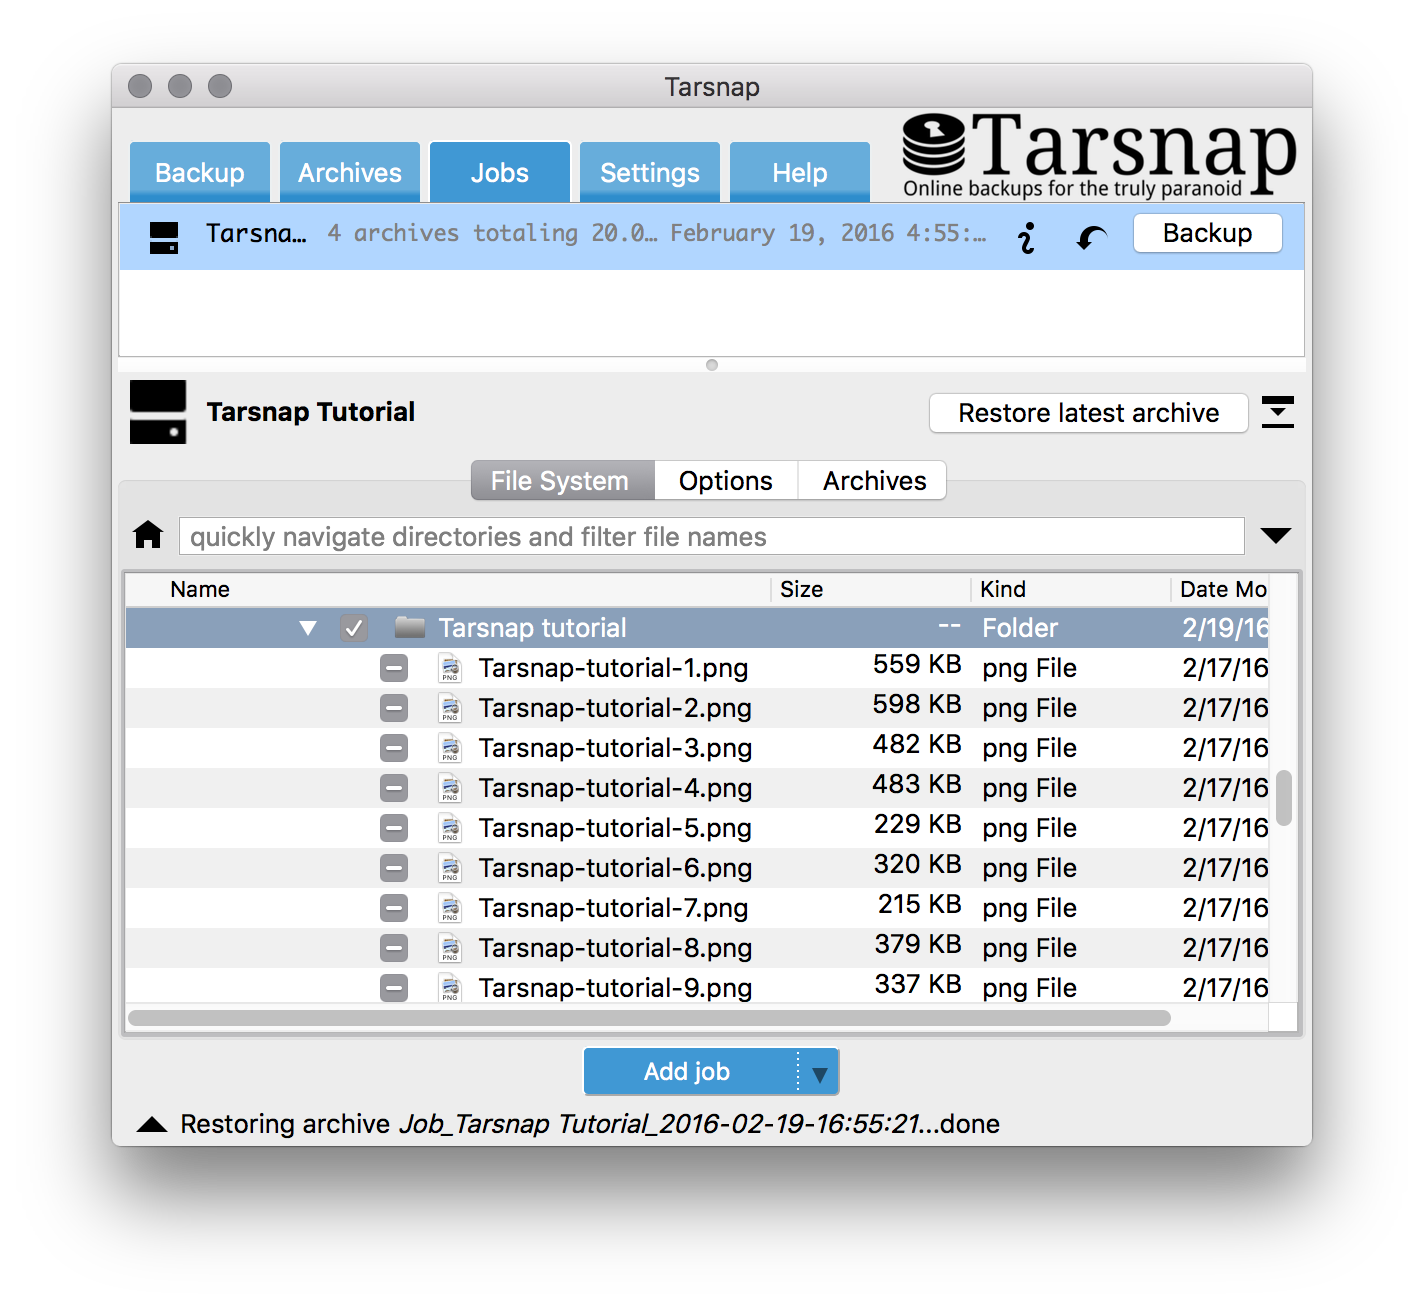
A couple seconds later, lo and behold, I have my work on this tutorial back. Not much of a surprise huh? Nobody likes surprises when it comes to backups anyway.
Afterword
While Tarsnap CLI and Tarsnap GUI is capable of much more than what is laid out in this primer, I hope this was enough of an introduction to get your feet wet and encourage you to start exploring the other things you can do with this setup on your own. If you prefer reading this tutorial in a PDF version here you go.
Relevant links:
Tarsnap website: https://www.tarsnap.com
Tarsnap on Github: https://github.com/Tarsnap
Tarsnap mail lists: https://www.tarsnap.com/lists.html
Tarsnap GUI releases: https://github.com/Tarsnap/tarsnap-gui/releases
Tarsnap GUI Wiki: https://github.com/Tarsnap/tarsnap-gui/wiki/Tarsnap